
At times we can embrace the aging thing and at other times we can fight it. I choose to fight the disappearing brows. I used to have very thick, full brows and it annoys the hell out of me that they are getting more and more sparse. I’ve tried brow growth serums to a mediocre result, but one thing I learned was that dyeing my brows really helps to keep them look more lush. I’ve had my brows dyed professionally and then someone suggested I do them myself (GASP!) and after getting over that crazy fear, I set about to do them on my own. So I’m here to teach you how simple it is and what a difference it can make when doing DIY Brows.
First a couple things to note – you can get rid of the grey brows with dyeing. I’ve had some of my brows hairs turning grey as early as my 30’s. And keep those fuzzy hairs around the brows in tact. Yes, tweeze the regular hairs that pop up under the brows, but keep any others – at least for now.
Step 1 – Prepare you kit
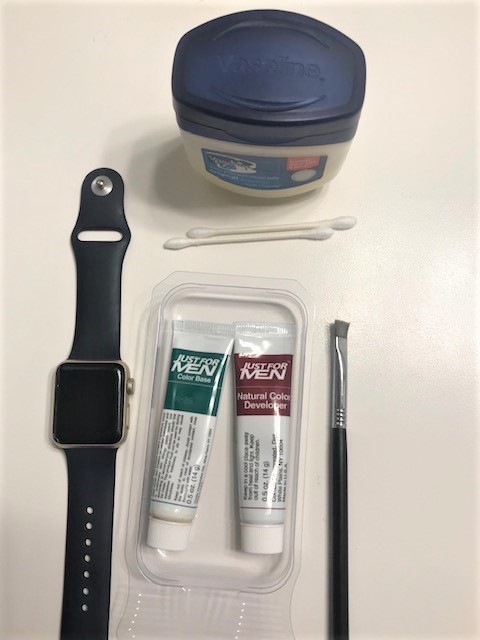 You will need the dye. I use Just For Men #35, an applicator and I use a flat makeup brush, Qtips, Vaseline and a timer.
Step 2 – Prepare brows. 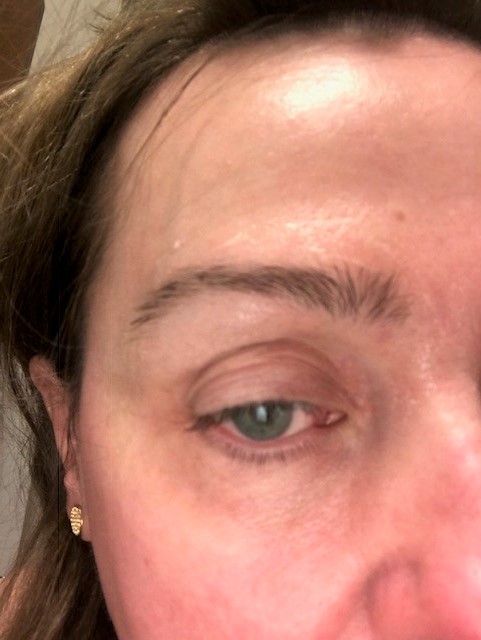
Take the Qtips and dip in Vaseline and put around brows where you do not want dye to reach. This will help with not having to remove unwanted dye at the end of the process.
Step 3. Mix
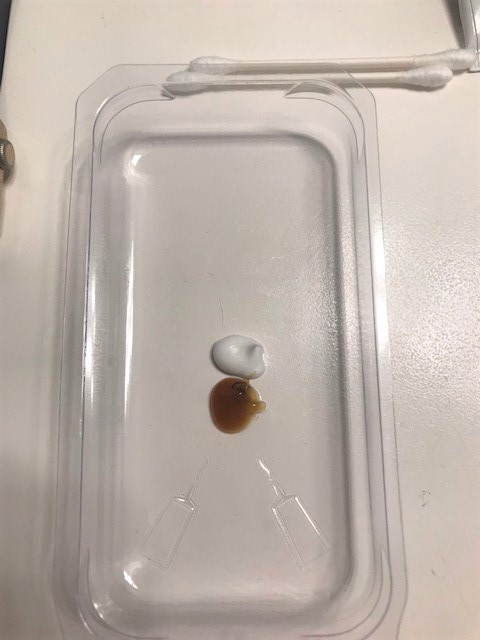 Use the tray that comes with the dye to mix it. Use equal parts. I use about a pea size of the color base and developer each. Mix together until blended well.
Step 4 – Apply to brows
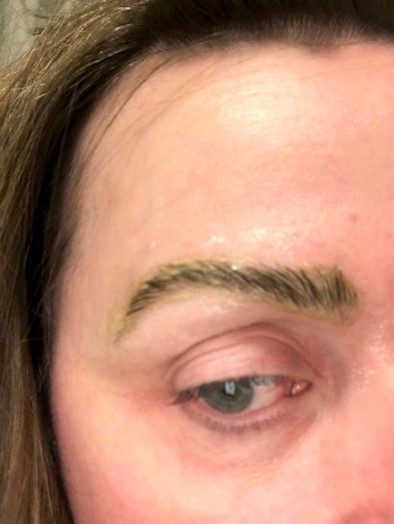
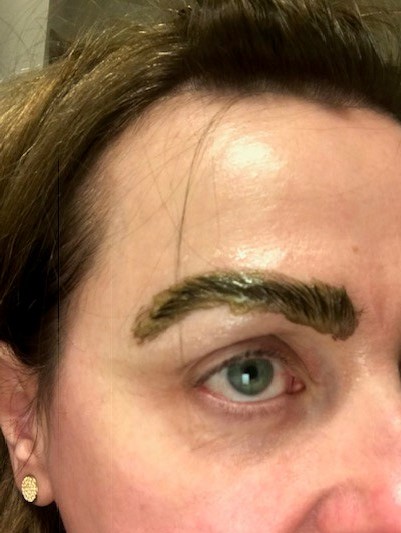
Use the flat brush to apply to brows. Apply thickly and make sure the grey hairs are thoroughly covered. After dye is applied, set the timer for 5 minutes.
The dye will appear light (as above) for awhile, but as time goes on, it will get darker. Really dark. Don’t be scared, your brows will not look like this when they are finished (below) Whew!
Step 5 – Removal
After waiting the full 5 minutes, remove the dye with a tissue and then any remaining residue with a damp tissue or cloth. If you have dye in an area you don’t want, try and scrub it off or use a bit of witch hazel to help remove it. But the Vaseline will help in the prevention of this step.
Step 6 – The Reveal
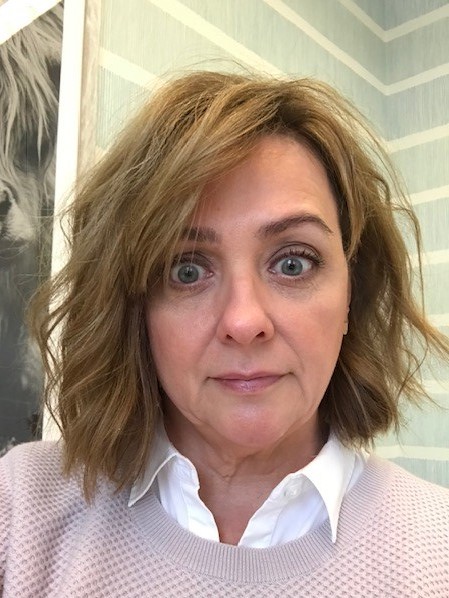
Aside from the ridiculous eye face I’m making here, they turned out pretty well! For about a week I don’t have to use a brow pencil or shadow for fillers. It lasts for several weeks at keeping the greys away.
Some additional pointers – your skin and those fuzzy hairs will be dyed, which is why you want to keep the fuzzies and they help in making the brows appear more full. Now you can tweeze any strays you want. When washing your face for the next 24+ hours, try and avoid the brows, as this will help the dye remain longer.
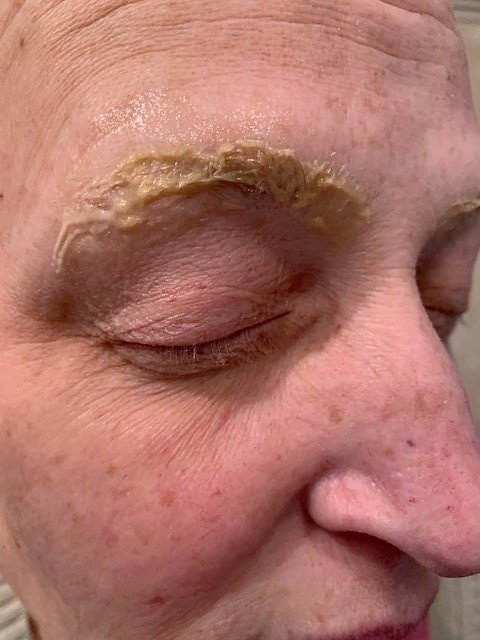
This past weekend we visited our friend Monica, who is going thru cancer treatments and has lost her hair, lashes and most of her brows. So it we did the DIY brows on her. Look how amazing they turned out!
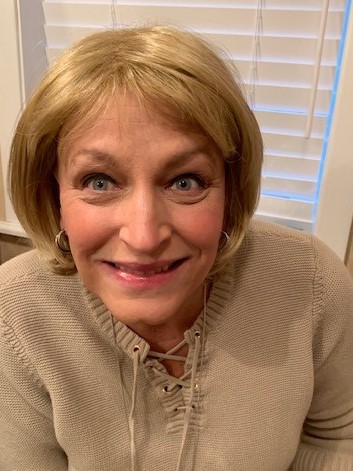
For her makeup, I used the Giorgio Armani foundation, the IT Cosmetics concealer, an eyeshadow palette from Bobbi Brown Holiday collection, similar to this one {Here} Westman Atelier blush and highlighter, Eyeliner from Chanel and gloss from the BB Holiday palette.
Suggestions for actually giving your eyebrows a shape? I hate my eyebrows which are a lot of gray so I’ll give the dye a try. Just need some shaping suggestions first.
Fantastic! You’ve given my courage – I’m going to try it! Monica looks gorgeous!
I started dying my brows using Just for Men years ago, using a very similar method – essentially everything but the Vaseline, which I will try next round. My brows are still pretty thick, but they are also very pale and getting paler as I get more white hair. I really like having defined brows without having to put any makeup on.